 Save to Pinterest
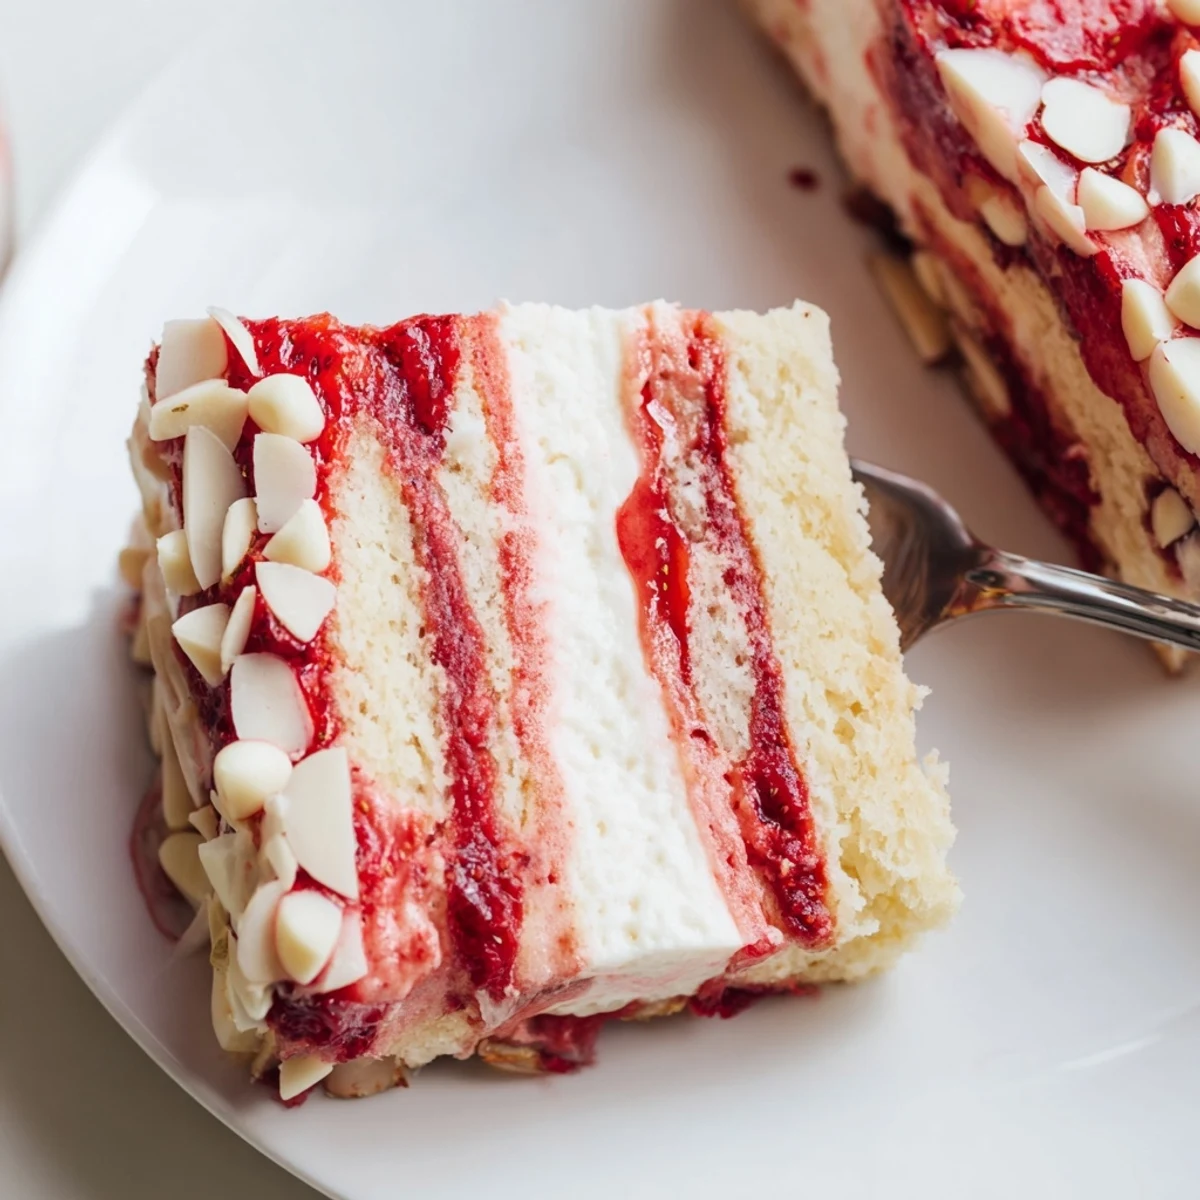
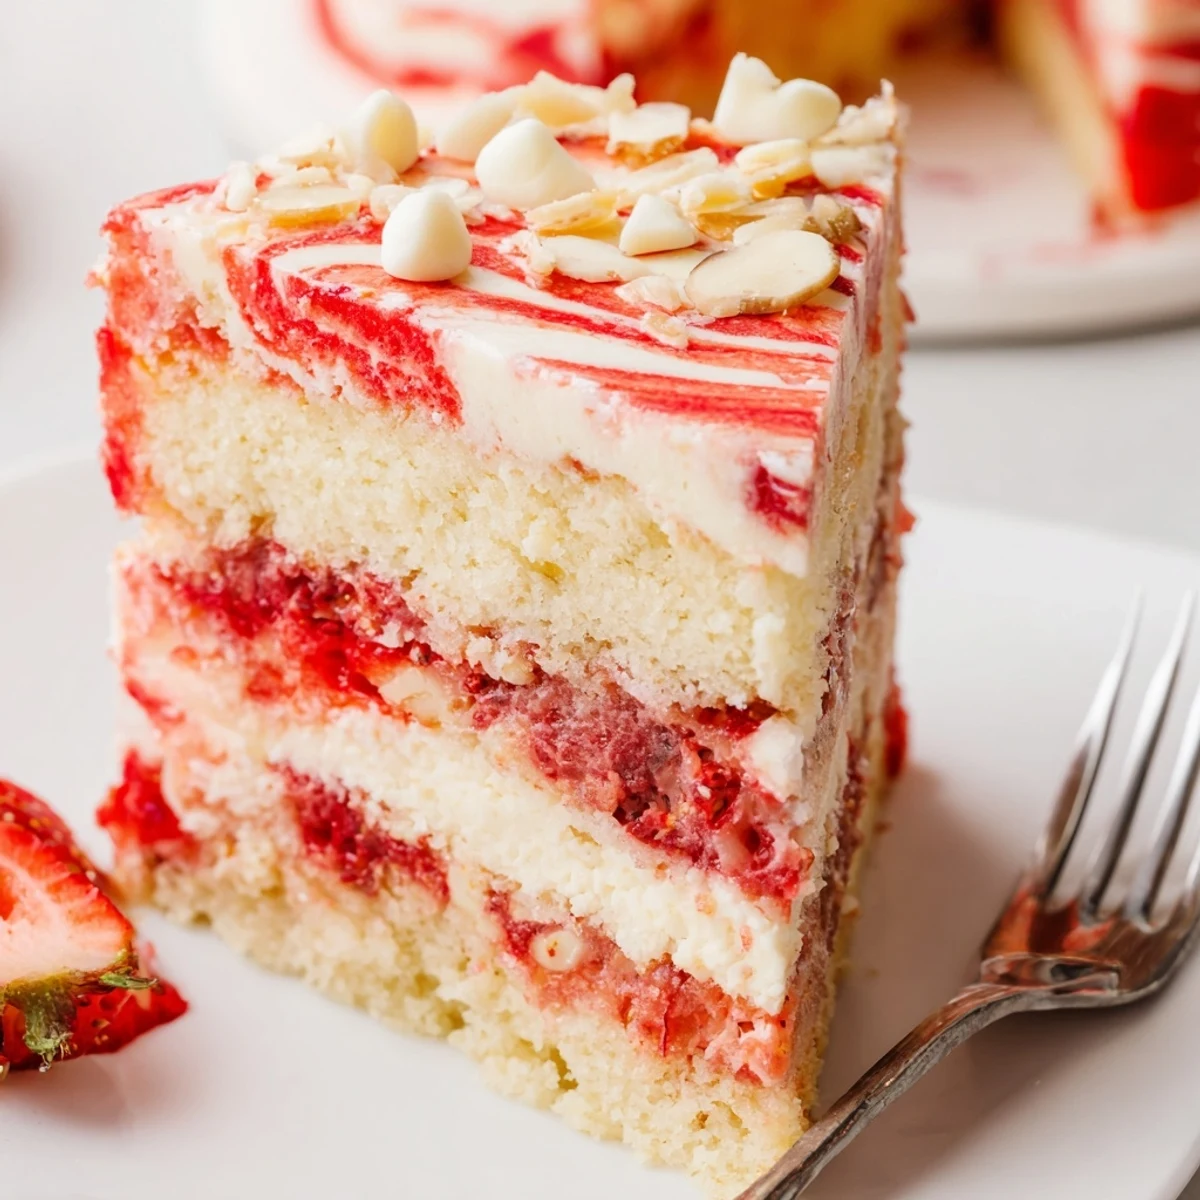
 This stunning marbled dessert combines tender vanilla cake with ribbons of creamy cheesecake filling and sweet strawberry swirls. The earthquake effect happens naturally during baking, creating dramatic cracks and crevices that show off the beautiful layers inside. White chocolate chips and sliced almonds add delightful texture and visual appeal.
Perfect for potlucks, gatherings, or anytime you want a dessert that truly steals the show. Serve slightly warm with vanilla ice cream for an extra indulgent experience.
Last summer my neighbor called me over at 8 PM holding a Tupperware container of something that looked like a beautiful mess. She called it earthquake cake and said the name comes from how everything shifts and settles while baking. One bite of that strawberry marbled magic and I was interrogating her for the recipe before I even finished chewing.
I made this for my daughters birthday party last month and watched it disappear faster than anything else on the dessert table. My friend Sarah actually hid the last piece in her purse because she didnt want to share it. Now whenever I mention Im baking something everyone asks if its that strawberry cake that fell apart in the best possible way.
Ingredients
- 1 box (15.25 oz / 430 g) vanilla cake mix: I have tried making this from scratch but honestly the boxed mix gives such consistent results and lets you focus your energy on the swirls and filling
- 3 large eggs: Room temperature eggs will blend more smoothly into your batter creating that perfect tender crumb we want
- 1/2 cup (120 ml) vegetable oil: The oil keeps the cake incredibly moist for days unlike butter which can sometimes make things feel dry after the first day
- 1 cup (240 ml) whole milk: I have used lower fat milk in a pinch but whole milk really does give you that rich bakery style texture
- 8 oz (225 g) cream cheese, softened: Do not cheat on the softening time because cold cream cheese creates lumps that no amount of mixing can fix
- 1/2 cup (115 g) unsalted butter, softened: I let both my cream cheese and butter sit on the counter for a full hour before starting and it makes the filling impossibly smooth
- 2 cups (240 g) powdered sugar: Sifting this beforehand prevents those annoying little clumps that end up in your cheesecake swirls
- 1 tsp vanilla extract: Use the real stuff because imitation vanilla can give the cheesecake filling an odd artificial taste
- 1 cup (320 g) strawberry pie filling or strawberry preserves: The pie filling creates those beautiful ribbons but I have used homemade strawberry jam when I wanted something less sweet
- 1 cup (170 g) fresh strawberries, sliced: Fresh strawberries add pops of brightness and a slight tartness that cuts through all the richness
- 1/2 cup (90 g) white chocolate chips: These melt into creamy puddles throughout the cake and I have discovered they actually taste better than milk chocolate here
- 1/2 cup (50 g) sliced almonds (optional): The almonds add a wonderful crunch but I have made this without them several times for people with nut allergies
Instructions
- Preheat your oven to 350°F (175°C):
- I always turn my oven on first thing and let it fully preheat while I prepare everything else because even temperature matters for the rise
- Grease a 9x13-inch (23x33 cm) baking pan:
- Use butter or cooking spray generously and line the bottom with parchment paper because this cake can be sticky and the paper makes removal effortless
- Prepare the cake batter:
- Combine the cake mix eggs oil and milk in a large bowl and beat until completely smooth with no lumps visible
- Make the cheesecake filling:
- Beat the cream cheese and butter together until fluffy then gradually add the powdered sugar and vanilla until everything is silky smooth
- Layer the base:
- Pour the cake batter into your prepared pan and spread it evenly into all corners
- Add the cheesecake swirls:
- Drop spoonfuls of the cheesecake mixture randomly over the cake batter then gently run a knife through the dollops to create a marbled pattern
- Create the strawberry ribbons:
- Dollop the strawberry pie filling across the surface and scatter the fresh strawberry slices over everything
- The final swirl:
- Gently drag your knife through the strawberry filling too but be careful not to overmix or you will lose those beautiful distinct ribbons
- Add the toppings:
- Sprinkle the white chocolate chips evenly across the top followed by the sliced almonds if you are using them
- Bake until golden:
- Bake for 45 to 50 minutes until the edges are pulling away from the pan and the center is mostly set with just a slight wobble
- Cool before serving:
- Let the cake cool in the pan for at least 20 minutes because cutting it while warm will cause those gorgeous layers to collapse into a gooey mess
 Save to Pinterest
 My grandmother tried a piece and said it reminded her of something her mother used to make back in the 1950s except with fresh strawberries instead of whatever fruit was in season. Seeing how food can connect generations through flavors and techniques made me appreciate this recipe even more.
Making It Your Own
I have swapped the strawberry filling for cherry and raspberry depending on what I have in my pantry and each variation brings something different to the table. The cherry version feels more decadent while raspberry adds a lovely tartness that cuts through the cream cheese layer beautifully.
Serving Suggestions
This cake needs nothing but I have served it with vanilla ice cream for extra indulgence and a dollop of freshly whipped cream for summer dinner parties. The contrast between the cold creamy topping and the warm strawberry swirled cake is absolutely worth the extra effort.
Storage And Make Ahead Tips
The cake keeps wonderfully covered at room temperature for two days though I actually prefer it refrigerated after the first day. You can bake the entire cake a day before serving and it will taste even better as those distinct flavors meld together into something more cohesive.
- Wrap the cooled pan tightly with plastic wrap if refrigerating to prevent the cake from absorbing other food odors
- Individual slices freeze beautifully for up to three months if you want to portion them for quick desserts later
- Let refrigerated cake sit at room temperature for thirty minutes before serving so the cheesecake layer softens
 Save to Pinterest
 Every time I serve this cake someone asks for the recipe and honestly that is the highest compliment a home cook can receive. Watching people close their eyes after that first bite tells me everything I need to know about why this earthquake cake earned a permanent spot in my recipe collection.
Recipe FAQs
- → What makes earthquake cake crack?
-
The cracks form naturally as the cheesecake filling and heavier strawberry swirls sink into the vanilla cake batter while baking. This creates the characteristic earthquake appearance with beautiful exposed layers.
- → Can I use fresh strawberries instead of pie filling?
-
Yes, you can use sliced fresh strawberries, though the pie filling creates a more intense strawberry flavor and vibrant swirl effect. Combining both gives you the best of both worlds.
- → How do I know when earthquake cake is done?
-
The edges should be golden brown and the center mostly set. A slight wobble in the middle is normal and expected due to the cheesecake layer. The cake will continue to set as it cools.
- → Can I make this earthquake cake ahead of time?
-
Absolutely. This dessert actually tastes better after chilling for a few hours or overnight. Store covered in the refrigerator and bring to room temperature before serving for the best texture.
- → What other fruit variations work well?
-
Raspberry or cherry pie filling make excellent substitutions for the strawberry. You could also try blueberry, blackberry, or even peach for different flavor profiles while maintaining the same stunning presentation.
- → Should I serve earthquake cake warm or cold?
-
Both ways are delicious. Slightly warm emphasizes the creamy cheesecake texture, while chilled makes it easier to slice and creates a firmer, more structured dessert. Room temperature offers a perfect balance.
