 Save to Pinterest
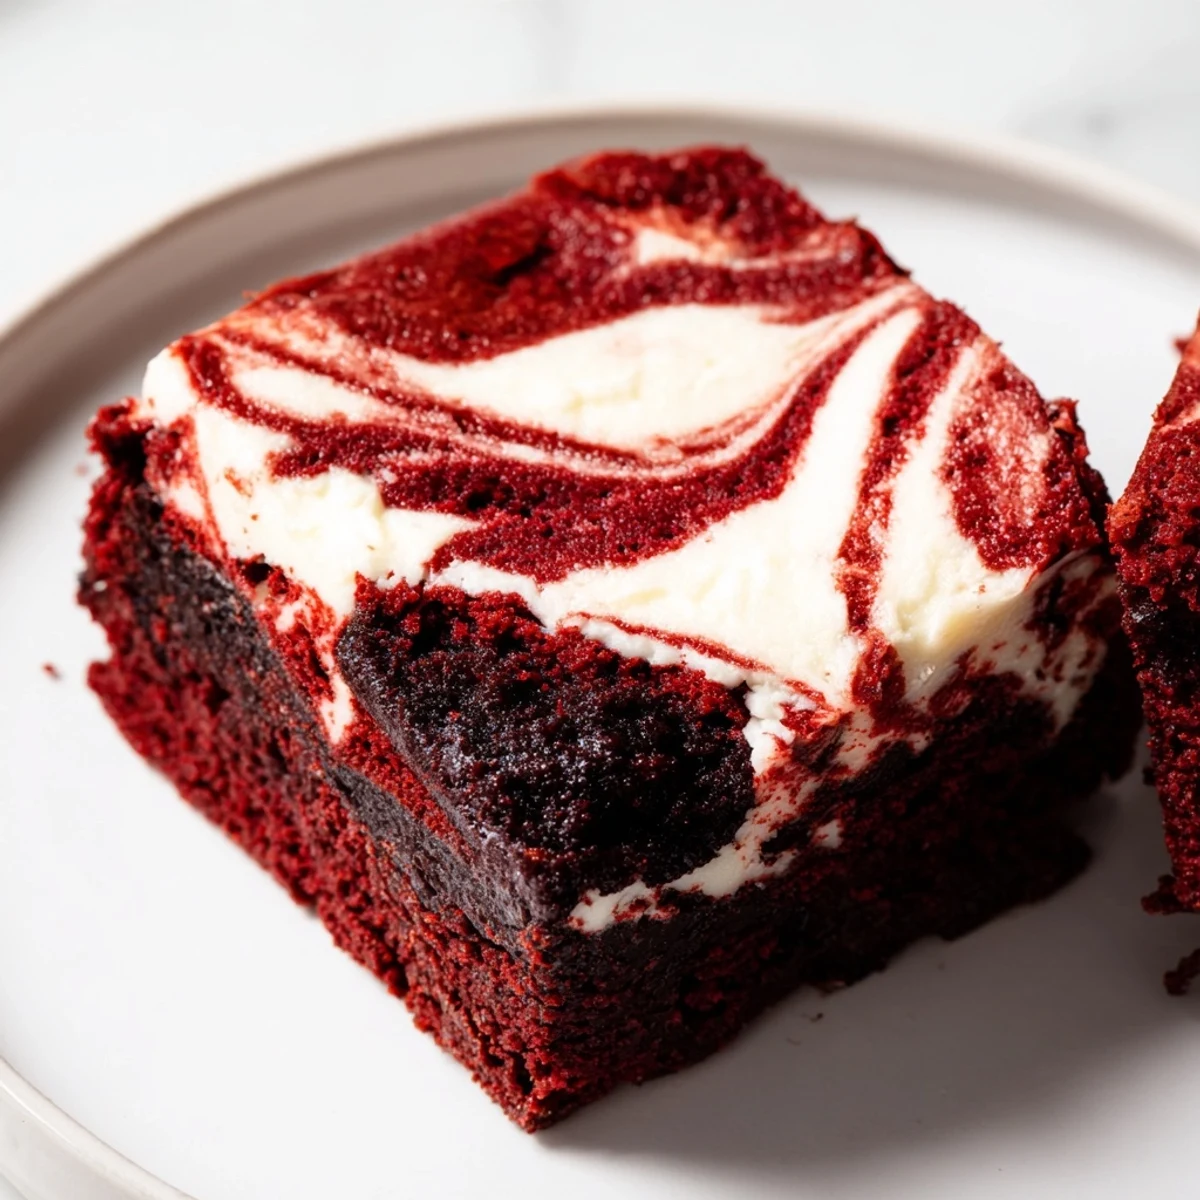
 These decadent red velvet brownies deliver a rich, fudgy chocolate experience, elevated by a luxurious cream cheese swirl. Beginning with a simple batter infused with vibrant red food coloring and cocoa, the preparation involves melting butter, whisking eggs, and folding in dry ingredients. A separate creamy mixture of softened cream cheese, sugar, egg yolk, and vanilla is prepared. The magic happens by swirling dollops of the cream cheese blend and reserved brownie batter into the main base. Baked until just set, these treats promise a perfect balance of tangy sweetness and deep cocoa flavor, making them an irresistible dessert for any occasion. Allow them to cool completely for the best texture before slicing.
The air was crisp, hinting at autumn, and a persistent craving for something rich yet bright had settled over me. I’d been seeing red velvet everything lately, but it was the promise of a fudgy brownie with that unmistakable tangy swirl that truly captured my imagination. The thought of pairing deep cocoa with creamy cheesecake was just too tempting to resist. I knew I had to get into the kitchen and make this dessert dream a reality.
I once decided to whip up a batch of these for a last-minute potluck, and in my rush, I barely swirled the cream cheese, convinced I'd ruined the aesthetic. But as they emerged from the oven, the subtle marble effect was even more captivating than my usual over-swirled attempts, proving that sometimes, less truly is more. Everyone raved about the taste, completely oblivious to my earlier kitchen anxiety.
Ingredients
- Unsalted Butter: Using unsalted butter gives you complete control over the salt content, allowing the flavors to truly shine.
- Granulated Sugar: This provides the perfect sweetness and contributes to that classic crinkly brownie top we all adore.
- Large Eggs: Make sure these are at room temperature; it helps everything emulsify beautifully for a smoother batter.
- Vanilla Extract: A splash of good vanilla is essential; it deepens the flavor profile of both the brownie and the swirl.
- Red Food Coloring: Gel coloring is my secret weapon here—it gives a vibrant red without thinning out the batter.
- All-Purpose Flour: Don't overmeasure; a light hand here ensures a tender, not tough, brownie.
- Unsweetened Cocoa Powder: This is where the rich chocolatey backbone comes from, providing a lovely contrast to the red.
- Salt: A tiny bit of salt enhances all the other flavors and balances the sweetness perfectly.
- Cream Cheese: Softened cream cheese is non-negotiable for a silky-smooth, lump-free swirl, so plan ahead!
- Egg Yolk: Just the yolk adds extra richness and helps bind the cream cheese mixture for a stable swirl.
Instructions
- Get Ready to Bake:
- Preheat your oven to 175°C (350°F). Line a 20x20 cm (8x8 inch) baking pan with parchment paper, making sure to leave an overhang on two sides for easy lifting later.
- Brownie Batter Magic:
- In a large bowl, whisk together the melted butter and sugar until they're well combined. Stir in the eggs, vanilla extract, and that vibrant red food coloring, mixing until everything is smooth and beautifully colored.
- Gently sift in the flour, cocoa powder, and salt. Using a spatula, fold the dry ingredients into the wet until they are just combined, being careful not to overmix; a few streaks of flour are okay.
- Prepare the Swirl:
- Spoon about ¼ cup of your gorgeous red brownie batter into a small bowl and set it aside for later. Pour the remaining brownie batter into your prepared pan and spread it evenly.
- Cream Cheese Dream:
- In a separate medium bowl, beat together the softened cream cheese, granulated sugar, egg yolk, and vanilla extract until the mixture is completely smooth and creamy.
- Artful Swirling:
- Drop spoonfuls of the cream cheese mixture evenly over the red brownie batter in the pan. Now, add small dollops of the reserved red brownie batter on top of the cream cheese spots.
- Take a knife or skewer and gently drag it through both batters, creating beautiful swirls and marbled patterns. Don't overdo it—you want distinct lines.
- Bake to Perfection:
- Slide the pan into your preheated oven and bake for 33 to 36 minutes, or until the edges are set and a toothpick inserted into the center comes out with just a few moist crumbs. Resist the urge to overbake!
- Cool and Enjoy:
- Allow the brownies to cool completely in the pan on a wire rack. Once fully cooled, use the parchment overhang to lift them out, slice them into squares, and prepare for deliciousness.
 Save to Pinterest
 These brownies became a staple for our family movie nights, their vibrant color a cheerful contrast to the darkened living room. One evening, my niece, with her face smeared with chocolate, declared them "magic cake," and that simple, honest joy truly solidified their place in my heart as more than just a dessert.
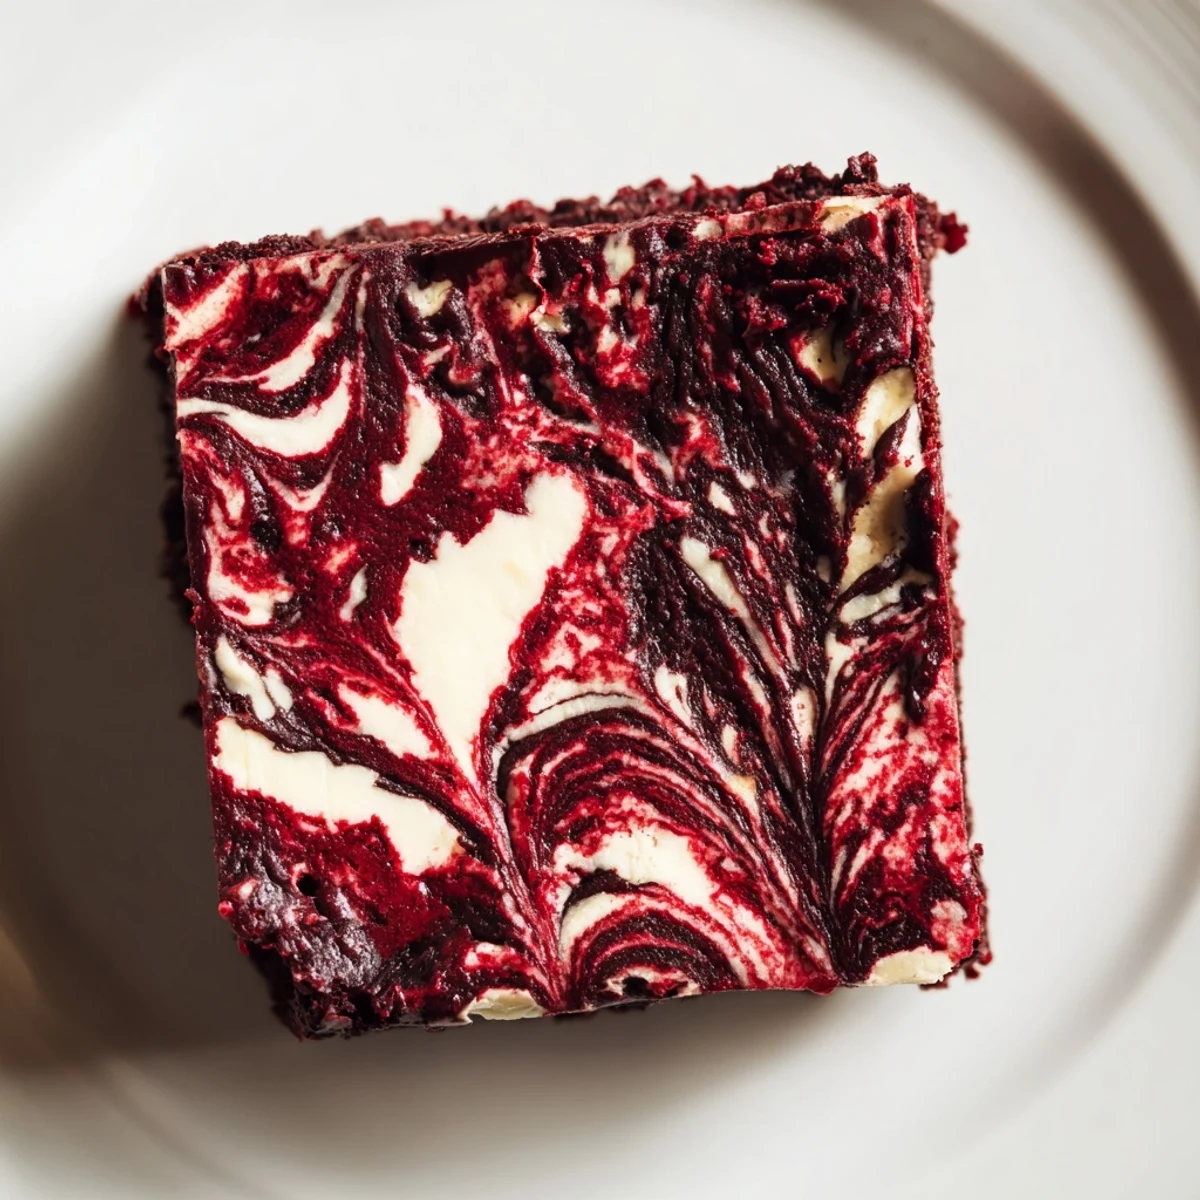
The Secret to a Stunning Swirl
Creating that perfect, eye-catching swirl is less about precision and more about playful movement. Think of it like finger painting; use light, flowing "S" shapes or figure-eights with your knife or skewer rather than heavy, repetitive motions. The goal is to gently marble the two batters without fully mixing them, allowing both the vibrant red and the creamy white to shine through distinctly. Don't stress too much about perfection; even a simple zigzag creates a beautiful effect.
Serving & Storing Your Delights
While tempting to devour immediately, these red velvet brownies actually deepen in flavor and firm up beautifully after a night in the refrigerator. I’ve found serving them slightly chilled really enhances the creaminess of the swirl. Store any leftovers in an airtight container in the fridge for up to 5 days, though I doubt they'll last that long!
A Splash of Color, A Dash of Flavor
Red velvet has such an interesting history, often debated between its humble origins from natural cocoa reactions and the more modern use of food coloring for that iconic hue. Regardless of its past, the combination of cocoa and tangy cream cheese is a winner every time.
- For an even richer cocoa punch, try using Dutch-processed cocoa powder.
- A sprinkle of flaky sea salt on top before baking really elevates the flavors.
- Always let your brownies cool completely before cutting for clean, picture-perfect squares.
 Save to Pinterest
 These Red Velvet Brownies are truly a treat for the senses, a vibrant dance of flavors and textures in every bite. I hope they bring as much joy to your kitchen as they have to mine.
Recipe FAQs
- → Why are my red velvet brownies not red enough?
-
The intensity of the red color largely depends on the type and amount of food coloring used. Gel food coloring often provides a more vibrant hue than liquid. Ensure you use the recommended amount or slightly more if a deeper red is desired.
- → Can I make these brownies ahead of time?
-
Absolutely! These brownies store well. Once completely cooled, keep them in an airtight container in the refrigerator for up to 5 days. They can be enjoyed chilled or brought to room temperature before serving.
- → What's the best way to get clean slices?
-
For perfectly clean cuts, ensure the brownies are completely cooled before slicing. Chilling them in the refrigerator for an hour or two can also help. Use a sharp, warm knife, wiping it clean between each cut.
- → Can I substitute ingredients for the cream cheese swirl?
-
The cream cheese is crucial for the signature tangy sweetness and creamy texture. Substituting it would significantly change the profile. For best results, stick to full-fat cream cheese.
- → How do I know when the brownies are done baking?
-
Bake until the edges are set, and the center still looks slightly soft but not jiggly. A toothpick inserted into the center should come out with moist crumbs, not wet batter. Overbaking can lead to dry brownies.
- → Can I use unsweetened cocoa powder?
-
Yes, the ingredient list specifically calls for unsweetened cocoa powder, which contributes to the deep chocolate flavor without adding extra sweetness that would unbalance the final product.
