 Save to Pinterest
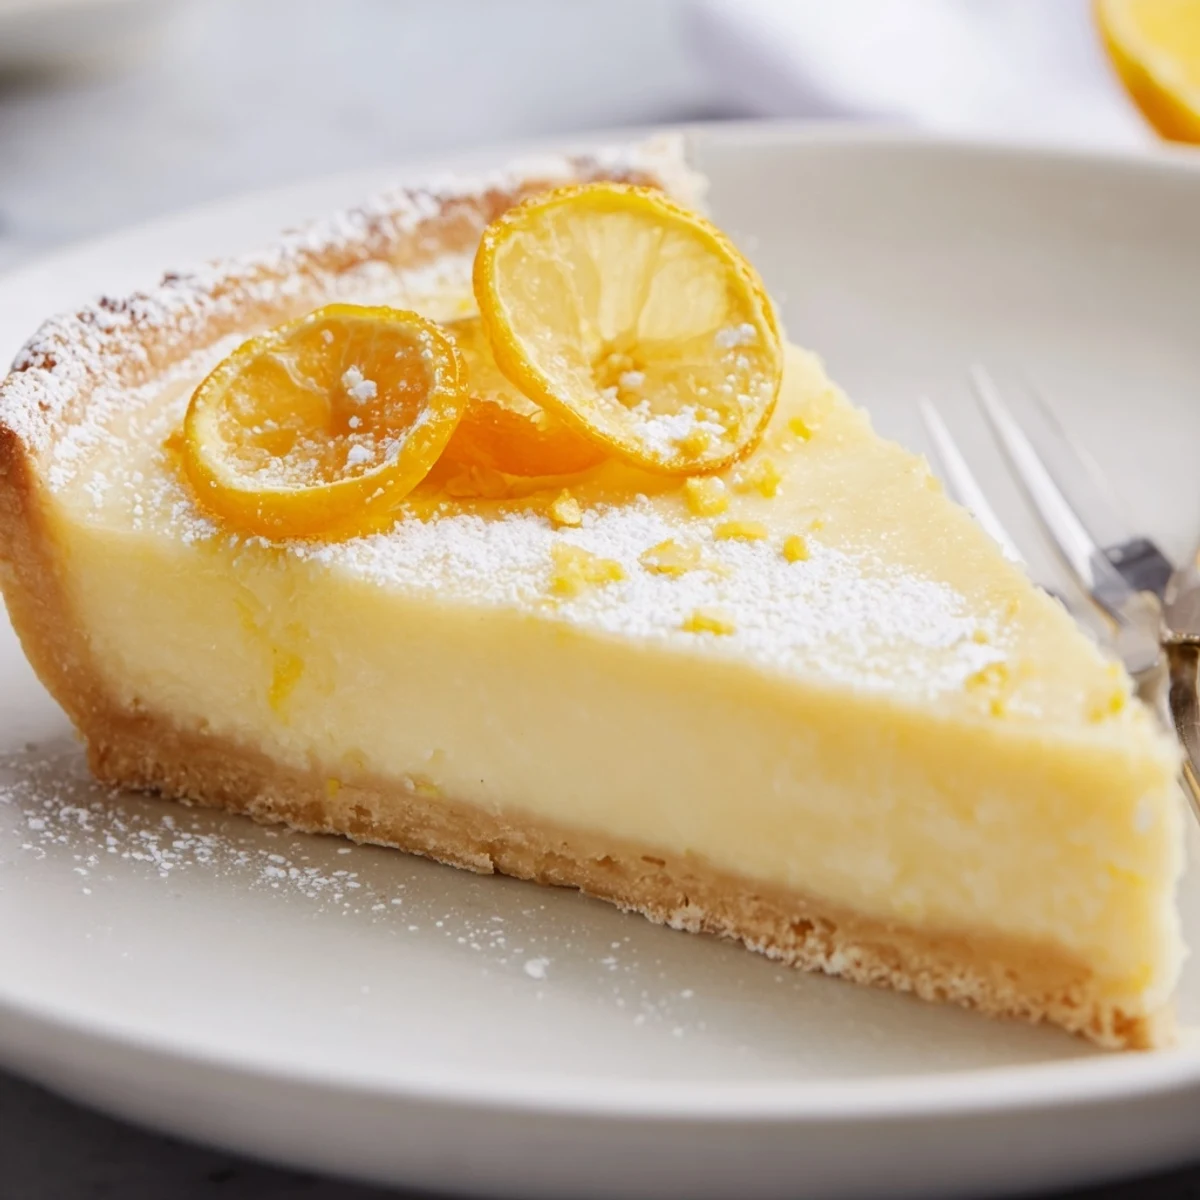
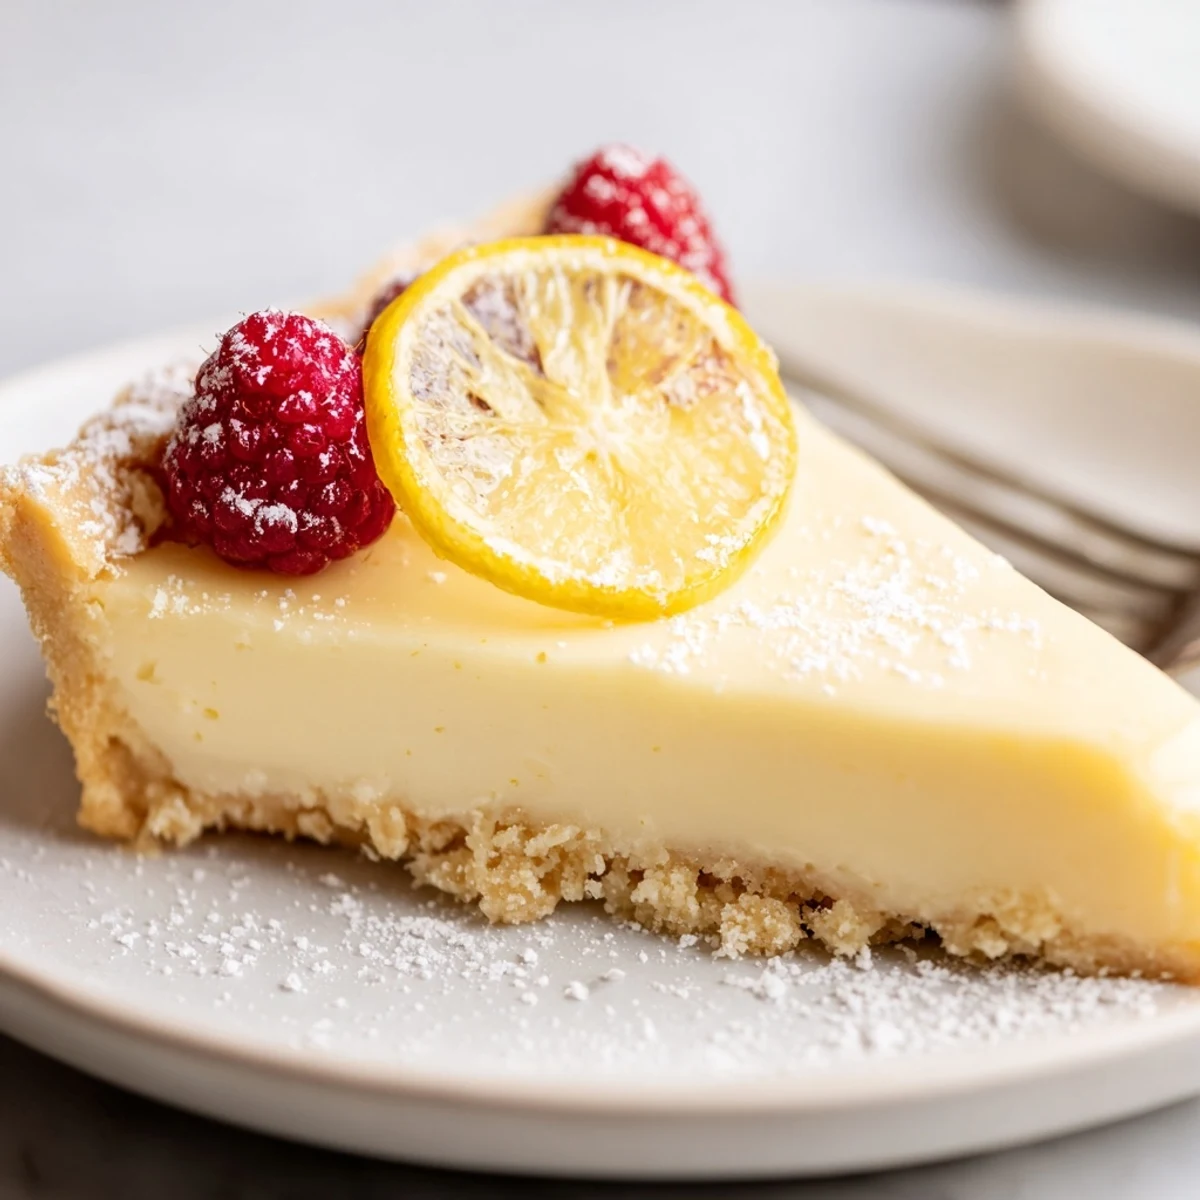
 A silky lemon tart with a crisp, buttery shell: pulse flour, powdered sugar and cold butter, bind with yolk and chill. Blind-bake the crust at 350°F until golden, then whisk heavy cream, sugar, eggs, yolks, lemon zest and juice until smooth. Pour into the shell and bake at 300°F until edges set and center is slightly jiggly. Cool fully and refrigerate at least one hour before dusting and serving.
The kitchen never smells quite as bright as when zesting a couple of lemons for this tart. I used to dread juicing citrus, but the soft whirr of the grater and the scent always makes me pause and smile. Lemon tarts have a reputation for being fussy, but after a few informal attempts (and some bubble-filled laughter over sunken middles), this creamy version became a staple. It’s both a comfort project and a show-off kind of dessert.
One Saturday in early spring, this lemon tart became our dinner party finale—the sun dipped low, someone spilled coffee, yet all talk stopped at the first tart bite. The hush was my favorite part (except laughter when someone insisted on licking their plate). Making this with friends hovering, sneaking berries before serving, made the dessert taste brighter and more memorable.
Ingredients
- All-purpose flour: Make sure to level off the cup so the crust stays delicate, not tough—I learned to avoid compacting it.
- Powdered sugar: It creates a crumbly, tender crust that dissolves under your fork; sift it if clumpy.
- Salt: Even that pinch matters—the flavor pops more when you don’t forget.
- Cold unsalted butter: Work quickly, and keep it chilly for a flakier crust—the cubes stay visible in the dough.
- Egg yolk: This bit of richness binds the crust together for a meltier texture.
- Cold water: I add it just a tablespoon at a time to keep the dough from getting sticky.
- Heavy cream: The secret to the silkier, mellow filling that doesn’t curdle; don’t use anything lighter.
- Granulated sugar: Dissolves easily for a glassy-smooth custard that’s never gritty.
- Eggs + egg yolks: The combination is key for a set-but-creamy finish—I learned not to swap or reduce them.
- Lemon zest: The oils in fresh zest give a floral kick—use a microplane and only the yellow part.
- Fresh lemon juice: Bottled juice won’t deliver that spark; squeezing your own is worth the mess.
- Pinch of salt: Essential for rounding out the tartness and balancing the filling.
- Powdered sugar (for garnish): A light dusting feels festive and hides tiny cracks.
- Fresh berries or candied lemon slices: Optional, but vibrant—and the color wowed everyone the first night I tried it.
Instructions
- Prep and simplicity:
- Preheat your oven to 350°F (175°C), letting warmth fill the kitchen while you gather your tools and ingredients.
- Crust blending:
- Pile your flour, powdered sugar, and salt into the food processor—pulse until cloud-like, then quickly scatter in the butter cubes and pulse until it becomes like coarse sand with buttery hints.
- Finishing the dough:
- Drop in the egg yolk and a splash of cold water; pulse until the dough just comes together—if it looks dry, add another drop, but don’t overmix.
- Rest and chill:
- Gather the shaggy dough, pat it into a disk, wrap snugly, and chill for 30 minutes—the fridge quiets everything down and makes rolling easier.
- Rolling and shaping:
- Roll the dough to 1/8-inch thickness; lining the tart pan feels like an arts-and-crafts moment, and pricking the base keeps air bubbles away before a quick freeze.
- Blind baking:
- Cover with parchment and pie weights or dried beans; bake for 15 minutes, then remove weights and bake until golden—your kitchen smells like your favorite bakery.
- Cooling and prepping:
- Let the shell cool a bit while you lower the oven to 300°F (150°C); this pause is your ticket to a crisp bottom crust.
- Lemon filling magic:
- In a bowl, whisk cream, sugar, eggs, yolks, zest, lemon juice, and salt till smooth—the color turns sunshine yellow and tastes like anticipation.
- Bake with care:
- Pour filling into the warm shell; bake until edges are set but center wobbles a little, about 20–25 minutes—don’t fret if it seems soft as it will firm up later.
- Chilling and finishing:
- Cool the tart completely, then refrigerate for at least an hour—it’s even better with time, so leave it alone (if you can).
- Serve and garnish:
- Dust with powdered sugar, toss on fresh berries or candied lemon, and share slices while the filling’s still cool and the crust crisp.
 Save to Pinterest
 I vividly recall my sister swooning over a barely set slice at midnight, straight from the fridge when we should have been asleep. In that quiet moment, tart and cool on our tongues, I stopped seeing it as ‘just dessert’—it was a bit of togetherness and a happy, shared secret.
How to Avoid a Soggy Crust
I learned the hard way that skipping the freeze before blind baking almost always leads to a soft bottom. Layering parchment and being generous with pie weights keeps the shape, and letting the shell cool before pouring in the filling stops steam from soaking in. Even if the edges get a little too golden, that crunch is a bonus rather than a problem.
Getting the Lemon Just Right
Use fresh, juicy lemons—never bottled juice—since the tartness lifts the custard in a way you can actually taste. If your lemons are slightly bitter, you can dial it down with a pinch more sugar, but I love the grown-up zing. Sometimes zest from an extra lemon brings just enough perfume to make guests swoon.
Serving and Storing Tips
This tart slices best with a knife dipped in hot water and wiped clean each time; it’s such a simple trick for flawless wedges. Take the chill off by letting the tart stand at room temp for ten minutes before serving. Don’t forget to hide a secret slice for breakfast, when the crust is crispiest and flavors brighter.
- Let it chill fully, or the filling will ooze when cut.
- Leftovers store well under a foil tent in the fridge for up to two days.
- A dusting of powdered sugar just before serving gives the tart a shimmery look.
 Save to Pinterest
 This lemon tart has a way of bringing people into the kitchen, hands reaching in before the first cut. Try it for a gathering or just a treat for yourself—you might find new reasons to make it again and again.
Recipe FAQs
- → How do I prevent a soggy crust?
-
Blind-bake the lined crust with pie weights until golden, remove weights and finish briefly to dry the base. Chill the dough before rolling and avoid overfilling to keep the shell crisp.
- → Can I swap the lemons for other citrus?
-
Yes. Use lime or orange for a different brightness, adjusting zest and juice to taste. Taste the filling before baking to balance sweetness and acidity.
- → How can I achieve a silky, smooth filling?
-
Whisk cream, sugar, eggs and yolks until fully combined and smooth. Avoid vigorous overwhisking once combined; bake until the edges are set and the center still jiggles slightly for a custard-like texture.
- → What substitutions work for the crust?
-
For gluten-free, use a tested gluten-free flour blend and handle gently. You can also swap some all-purpose flour for ground almonds for a nuttier crust, keeping proportions similar.
- → How long can I store the tart?
-
Keep covered in the refrigerator for up to 3 days. Chilling helps the filling set; let slices sit a few minutes at room temperature before serving for the best texture.
- → Can I prepare elements ahead of time?
-
Yes. The crust dough can be made and chilled a day ahead, and the baked shell stored overnight. The filled tart is best assembled and chilled a few hours to a day before serving.
