 Save to Pinterest
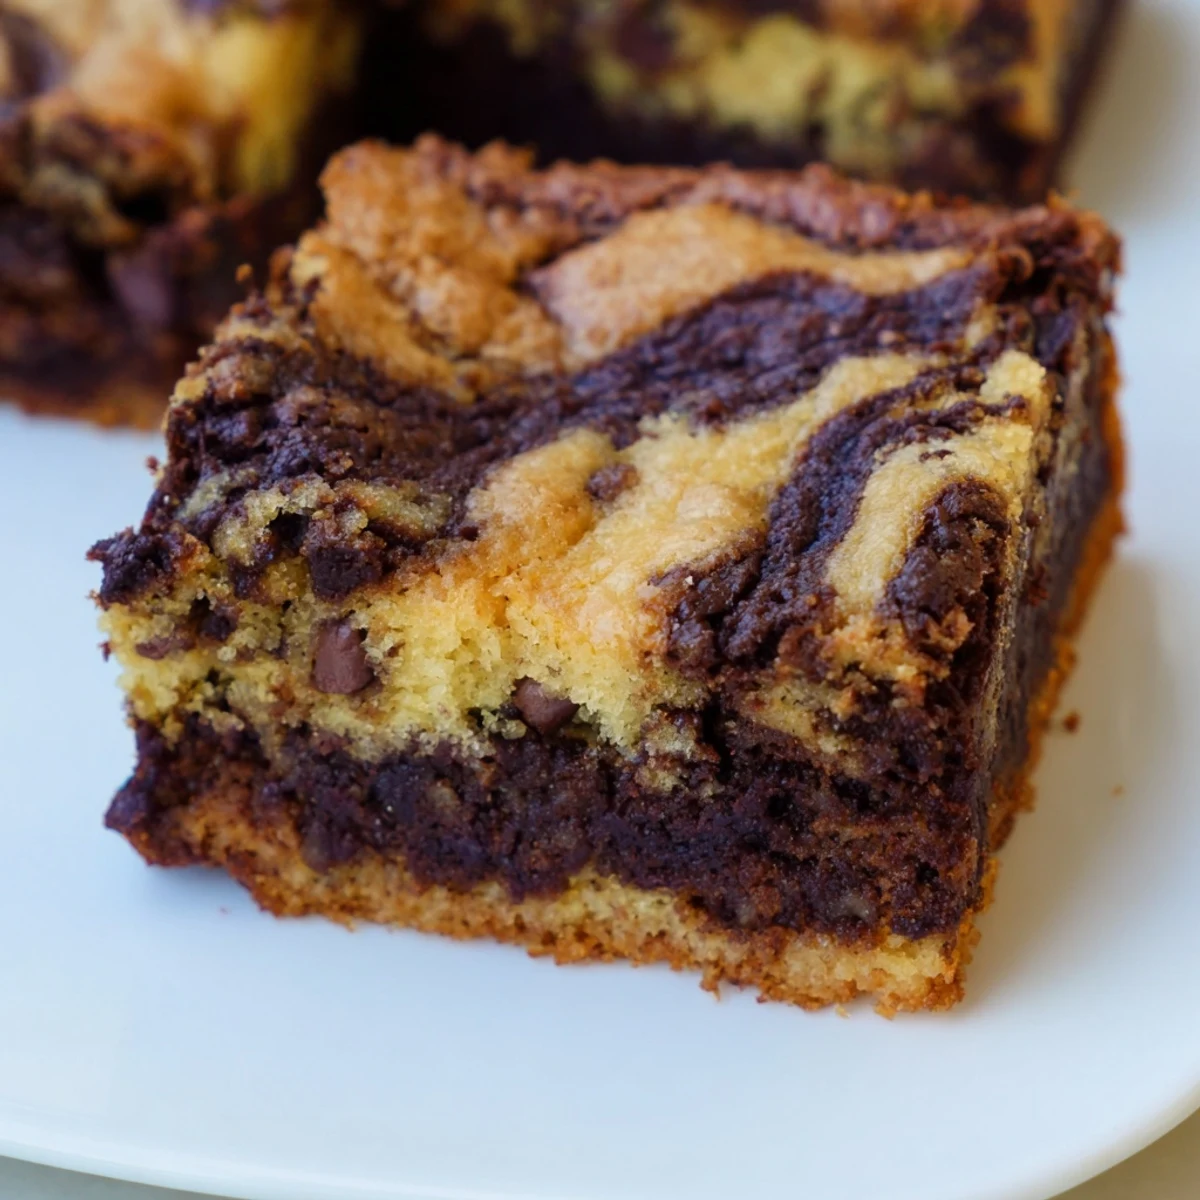
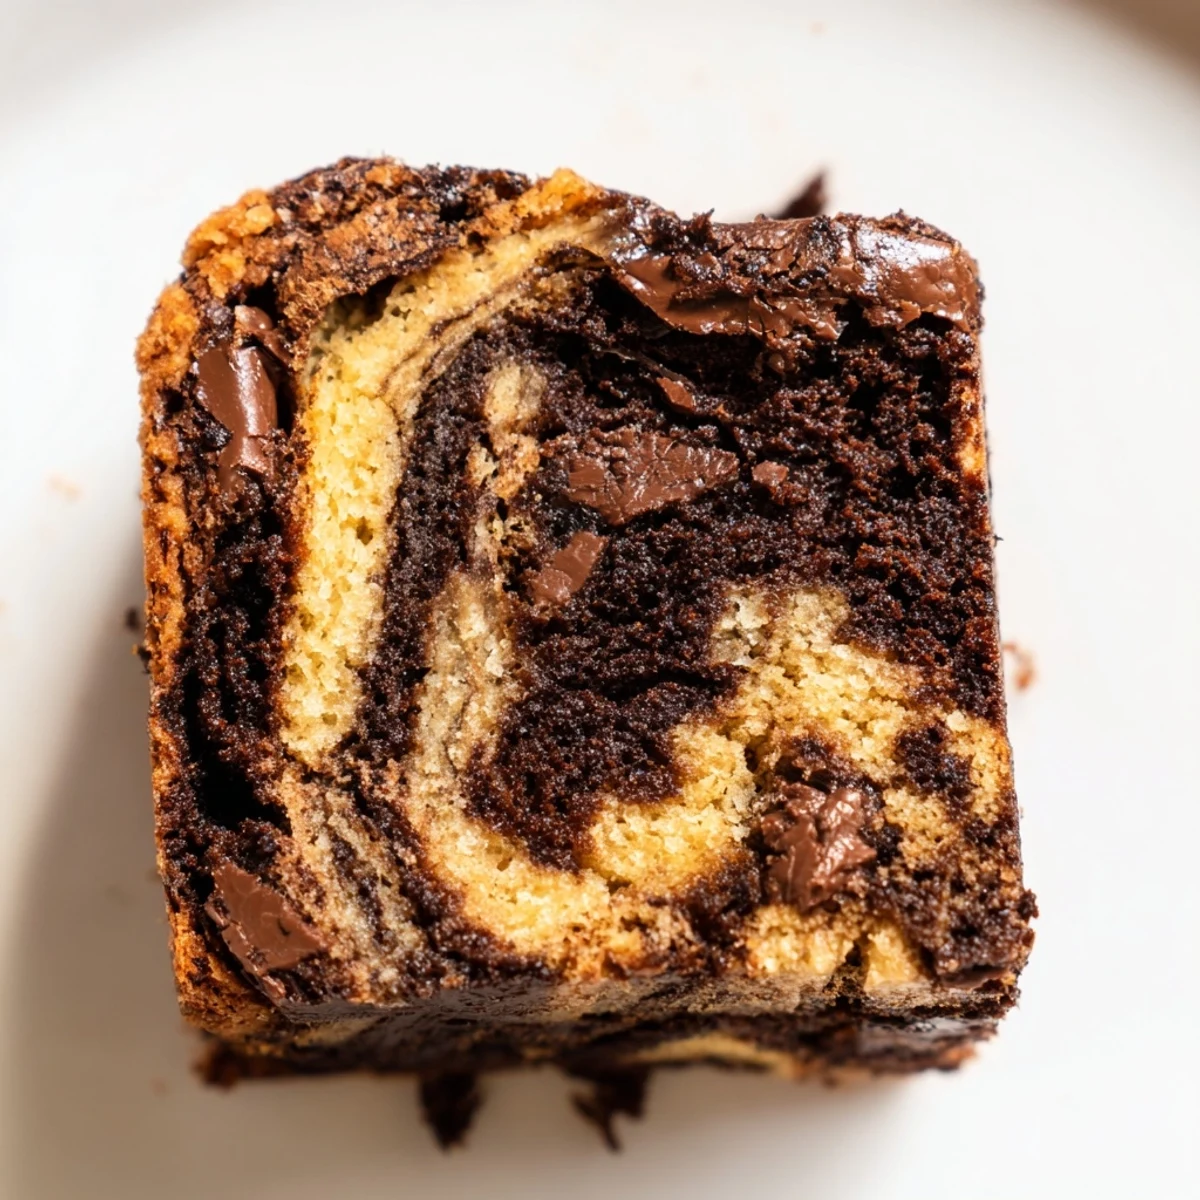
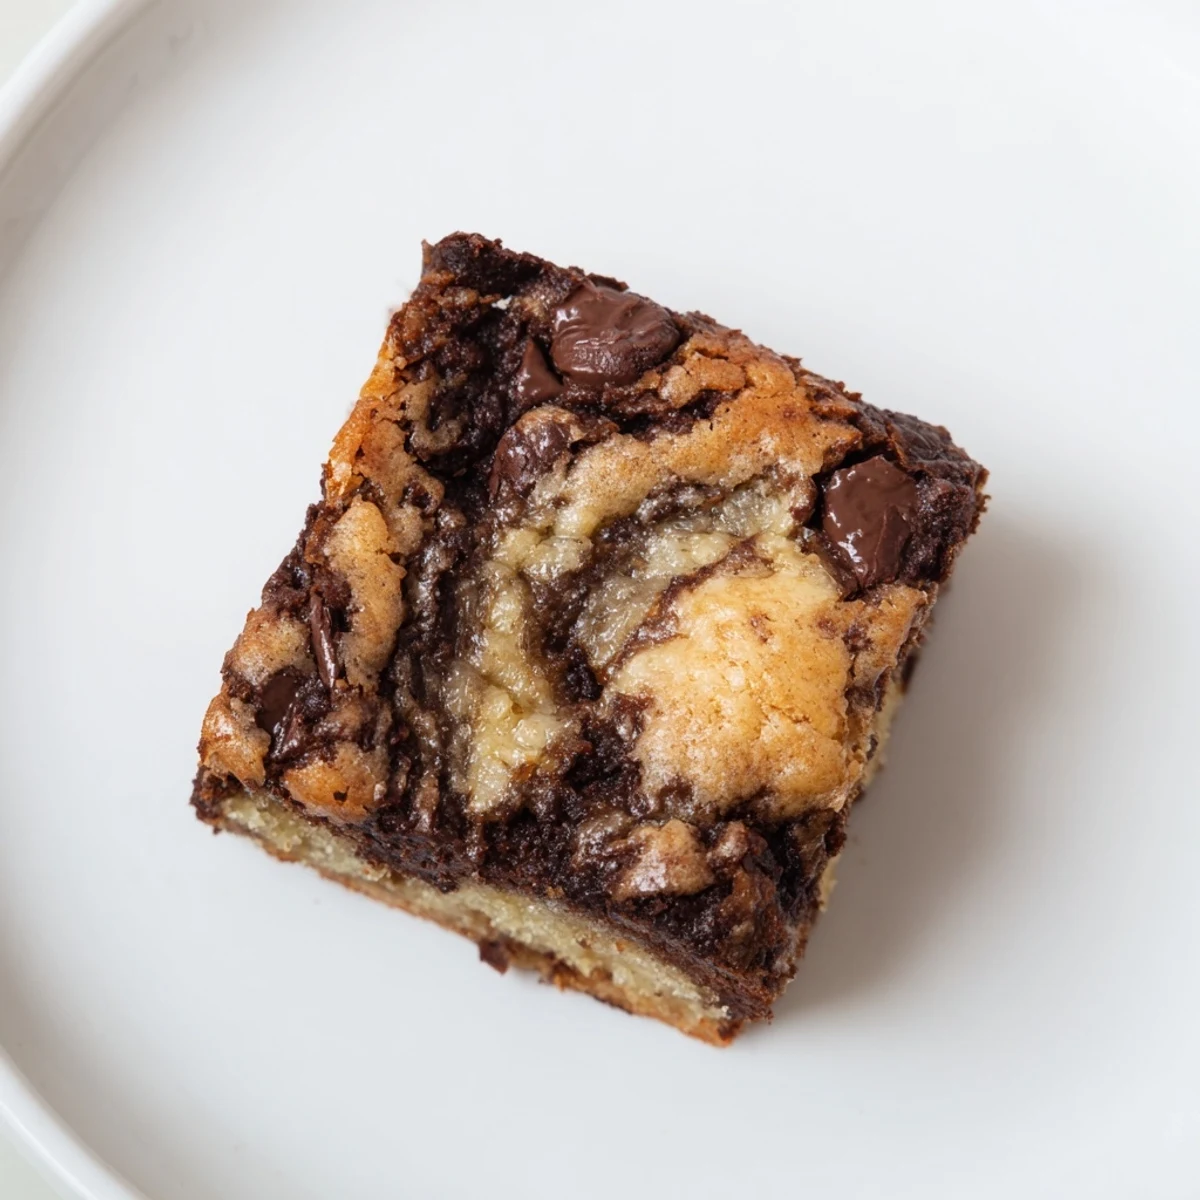
 These irresistible bars combine the best of both worlds—rich, fudgy brownie layers swirled with sweet, moist banana bread. The marbled creation delivers deep cocoa flavor complemented by natural banana sweetness in every bite.
Perfect for using up ripe bananas, this simple treat comes together in just 45 minutes with basic pantry ingredients. The contrasting textures create a satisfying experience—fudgy chocolate sections meet tender banana-spiced portions throughout each bar.
Serve them warm with ice cream for an extra indulgent dessert, or enjoy at room temperature as a snack. The recipe yields 16 bars, making it ideal for gatherings, potlucks, or weeknight treats.
The smell of overripe bananas always makes me smile. I remember coming home after a long shift to find my roommate had set aside a bunch of spotted bananas specifically for baking experiments. Those brown speckled fruits that most people toss away became our excuse to try something wild. This recipe came from one of those midnight kitchen adventures where we just threw two favorites together.
My neighbor swore she hated banana bread until I brought over a plate of these warm bars. She took one bite and immediately asked for the recipe saying she never knew bananas and chocolate could be this good together. Now we make a batch together every Sunday and split the pan. It has become our weekend tradition that we both look forward to all week long.
Ingredients
- 1 cup ripe bananas mashed: The uglier and more spotted your bananas are the better these bars will taste with natural sweetness
- 1/2 cup granulated sugar for banana layer: You can reduce this slightly if your bananas are super ripe and sweet
- 1/3 cup unsalted butter melted: Make sure it has cooled slightly before adding so it does not scramble the eggs
- 1 large egg: Room temperature eggs incorporate better into the batter for a smoother texture
- 1 tsp vanilla extract: Pure vanilla extract makes a noticeable difference in the final flavor
- 1 cup all-purpose flour: Spoon and level the flour instead of scooping directly to avoid packing it down
- 1/2 tsp baking powder: This gives the banana layer its lift and light texture
- 1/4 tsp baking soda: Works with the acidic bananas to help the batter rise
- 1/4 tsp salt: Balances the sweetness and brings out the chocolate flavor
- 1/2 cup unsalted butter melted for brownies: Quality butter matters here since it carries the chocolate flavor
- 3/4 cup granulated sugar: Brownies need this much sugar to get that crackly top we all love
- 2 large eggs: These create the fudgy texture that makes brownies so irresistible
- 1 tsp vanilla extract: Do not skip this even though you also use it in the banana layer
- 1/3 cup unsweetened cocoa powder: Sifting it first prevents clumps and ensures smooth batter
- 1/2 cup all-purpose flour: Just enough to hold the brownies together without making them cakey
- 1/4 tsp salt: Enhances the chocolate intensity significantly
- 1/2 cup semi-sweet chocolate chips: Fold these in gently so they stay suspended throughout the brownie layer
Instructions
- Preheat your oven and prepare the pan:
- Set your oven to 350°F and line an 8x8-inch baking pan with parchment paper leaving some overhang so you can lift the bars out easily later.
- Mix the banana batter base:
- In a medium bowl combine the mashed bananas sugar melted butter egg and vanilla extract until everything is smooth and well incorporated.
- Combine banana dry ingredients:
- Add the flour baking powder baking soda and salt to the banana mixture stirring just until combined. Be careful not to overmix or the bars will be tough instead of tender.
- Prepare the brownie mixture:
- Whisk together the melted butter and sugar in a separate bowl until glossy then beat in the eggs and vanilla extract until the mixture looks smooth and shiny.
- Add chocolate dry ingredients:
- Sift in the cocoa powder flour and salt then stir until just combined. Gently fold in the chocolate chips being careful not to overwork the batter.
- Layer the batters:
- Spread half the banana batter in the prepared pan then spoon the brownie batter over it. Dollop the remaining banana batter on top in random spots.
- Create the marble effect:
- Run a knife or skewer through the batters in a swirling motion but do not overdo it. A few passes through the batter creates beautiful marbling without muddying the distinct layers.
- Bake to perfection:
- Bake for 28 to 32 minutes until a toothpick inserted near the center comes out with a few moist crumbs attached. The center should still feel slightly soft.
- Cool completely before slicing:
- Let the bars cool completely in the pan before using the parchment paper to lift them out. Slice into 16 squares and enjoy the contrast between the layers.
 Save to Pinterest
 My aunt used to make something similar when I was little but she never wrote down the recipe. I spent years trying to recreate that memory until this combination finally clicked. Now whenever I bake these the whole house smells exactly like her kitchen did and that is the best part.
Getting The Perfect Swirl
The trick to a beautiful marble pattern is using a light touch with your knife. I learned the hard way that too much swirling just blends everything into a muddy mess. Just drag your knife through the batters in a figure eight motion once or twice and stop. The distinct pockets of banana and chocolate make each bite unique and exciting.
Storage Secrets
These bars actually taste better on day two when the flavors have had time to mingle and develop. I keep them in an airtight container on the counter for up to three days or freeze them individually wrapped for those emergency dessert moments. The texture stays perfectly moist and the marbled swirl still looks impressive even after freezing.
Serving Ideas
Warm these bars slightly in the microwave for about 15 seconds before serving and the chocolate chips get all melty and gooey. A scoop of vanilla ice cream on top turns this into an incredible dessert that feels like it came from a fancy bakery. They also make an amazing base for banana splits or can be crumbled over vanilla pudding.
- Sprinkle sea salt on top while they are still warm for a sweet and salty finish
- Add a tablespoon of instant coffee to the brownie layer for a mocha twist
- Try mixing chopped walnuts into the banana layer for extra texture and crunch
 Save to Pinterest
 These bars have become my go-to for potlucks and bake sales because they always disappear first. Hope they become a favorite in your kitchen too.
Recipe FAQs
- → How do I know when the bars are done baking?
-
Insert a toothpick near the center of the pan. It should come out with a few moist crumbs attached, not completely clean. The edges will be set but the center may still appear slightly soft. The bars will continue to firm as they cool.
- → Can I use frozen bananas?
-
Yes, thaw frozen bananas completely and drain any excess liquid before mashing. Frozen bananas tend to be sweeter and softer, which works beautifully in this combination.
- → How should I store these bars?
-
Keep in an airtight container at room temperature for up to 3 days. For longer storage, refrigerate for up to a week. You can also freeze individual bars wrapped in plastic for up to 3 months.
- → Can I make this dairy-free?
-
Substitute the butter with coconut oil or a plant-based alternative. Use dairy-free chocolate chips. The texture will remain similar with these simple swaps.
- → Why did my bars turn out dry?
-
Overbaking is the most common cause. Check at the 28-minute mark and remove from the oven as soon as a toothpick shows moist crumbs. Also, ensure your bananas are ripe with plenty of brown spots for maximum moisture.
- → Can I add nuts to this recipe?
-
Absolutely. Fold 1/2 cup chopped walnuts or pecans into either the banana or brownie layer before baking. You could also sprinkle them over the top before baking for added crunch.
